Showing posts with label Stampin' Up. Show all posts

Friday, August 15, 2014

Gorgeous Grunge and Work of Art Swap Share Convention 2014

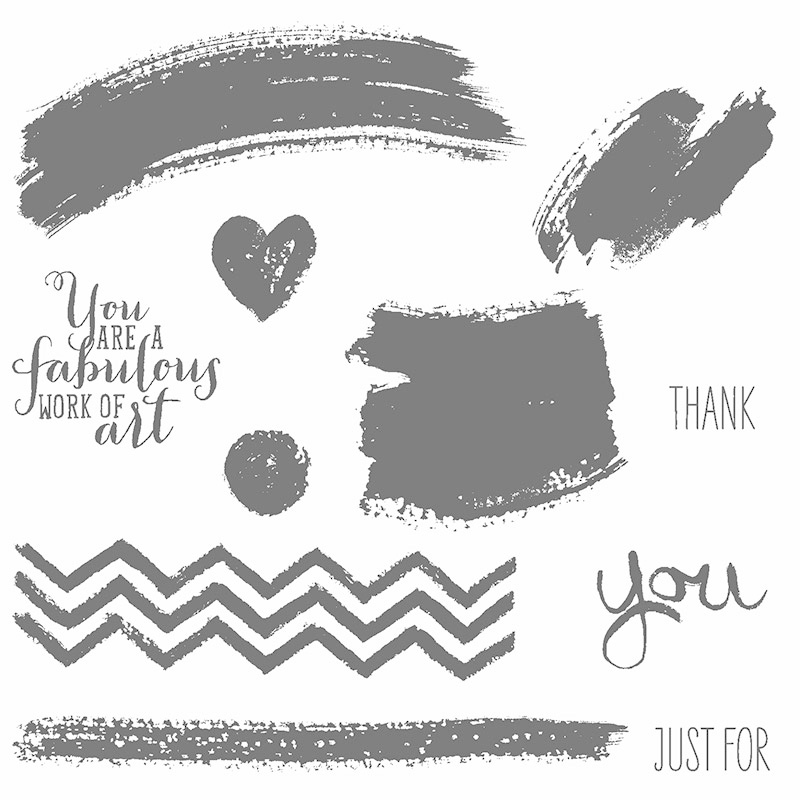
This card features both the Gorgeous Grunge stamp set as well as the Work of Art stamp set. These two sets compliment each other when paired for a fabulous finished product! This is another swap I received at Convention. It did not have a label so I have no one to give credit to for this fabulously stamped card.  This is an amazing card. I love the explosion of color and the well placed banner. See below for the details:

Gorgeous Grunge (wood 130514) (clear 130517)

Work of Art (wood 134111) (clear 134114)

To get started with making cards for every important event in your life, shop my online store 24/7.
Thanks for stopping by, now go create something great!

Thursday, August 14, 2014

Gorgeous Grunge Convention 2014 Swap Share

 I have two swaps to share today. Both feature the Gorgeous Grunge stamp set and both are from some talented stampers. Thy both made my mouth fall open when I received them at Convention. I am in love with this first card created by Demonstrator Lisa Fuller. This card is fabulous!!! I love the colors, the layout, the flowers and their inked edges. This is one fantastic card. It uses the Gorgeous Grunge stamp set in a way I never would have thought to do. I am so grateful for swaps because they give me ideas outside of my normal approach to crafting. Awesome, awesome, awesome!!!
This is another darling card using the Gorgeous Grunge stamp set. The colors are soft and calm. They make me think of a soft spring rain. Did you notice the pearls on the butterfly or the sequins strategically placed? This pretty card was created by Demonstrator Valerie Kobayashi of Honolulu, HI. She used the Happy Birthday wording from the Hey You stamp set (wood 134516) (clear 134519).


Gorgeous Grunge stamp set (wood 130514) (clear 130517) and the Hey You stamp set (wood 134516) (clear 134519) can be purchased through my online store HERE. Get yours today so you can start making your own works of art.

Thanks for stopping by, now go create something!

Tuesday, August 12, 2014

Work of Art Convention 2014 Swap Share

 Here are several more of the swaps I got at this years' Convention. All of these cards feature the Work of Art stamp set. This is a versatile stamp set and all of the images in the set work well together. This set is also great paired with the images in the Gorgeous Grunge stamp set. This first card was created by Demonstrator Kathy Barbour. I love how she made a palm tree with the images from the Too Kind stamp set.
This second card was created by Demonstrator Nicole Wetsch. Hers looks like a rainbow. I love how the colors soften with each flourish. It uses the Decorative Dots embossing folder and twine. Super cute!
This next card has such a softness to it. It was created by, Demonstrator Barbara Reed. It has a collage look to it. The heart really gives a point of focus. Gorgeous!!
This adorable card was created by Demonstrator Valerie Kobayashi. She cased it from Sandi MacIver and Heather Wright-Porto. I love the rich boldness of the colors on this card. This card has two layers but looks like there is so much more to it. The top layer has some cutouts that allow the second layer to peek through. It is uh-dor-uh-ble!! Along with the Flowering Flourishes stamp set this card is a work of art and makes a strong statement.
This card has a lot of super cute features. The colors are soft. The use of  Blackberry Bliss ink for the circles are a great contrast to the the Lost Lagoon ink and card stock. The little touch of Hello Honey adds a nice little touch as do the little dots of glimmer paper. This great card was created by Demonstrator Carmelita Wasson.
This last card seems so happy and refreshing. This awesome card was created by Demonstrator Sue Pardo. A good friend of mine. I love the rhinestones on the butterflies and how she layered the butterflies on the yellow images. Creative and classy! I love it.


Thanks for stopping by to see all of the wonderful cards created by fellow demonstrators using the Work of Art stamp set (134111). I can't wait to start sharing these cards at my future events. Shop my online store 24/7.

Sunday, August 10, 2014

Something To Say - Masculine Card


I have another card that could be considered a masculine card. It was quick and easy. I usually like to layer my cards but this one seemed to work with just the single layer. I used the wording from the Something To Say stamp set. I like the sketched look of the font and images in this set. I decided to add a golden star for a bit of pizazz. The texture on this card is from the Honeycomb Textured Impressions embossing folders. I used the In Colors Backgrounds Designer Series Paper Stacks for the two banner pieces. Card stock used is Craft and Hello Honey. I stamped the heart in real red ink. Say Something is a 14- Saying stamp set that will have you ready with cards for anything! Check out the images below:


 Say Something stamp set (134180) is available at my website, just shop my online store 24/7.

Thanks for stopping by, now go create something!

Friday, February 14, 2014

A Glimmery Valentine's Day


Happy Heart Day! 

Can you say "Glimmer?" I put a lot of glimmer into this years Valentine's Day cards and am very pleased with how they each turned out. This first one is for my hubby. Sometimes I need a bit of inspiration to get started stamping...and today was one of those days. I came across this wonderful card on my blog hopping trails. It was inspired by Chat's lovely card. See it HERE. I love cards that are both simple and elegant. I changed the color scheme and used Designer Series paper in place of stamping the background and of course I added a glimmery heart. I used the new Boutique Embossing machine for my dry embossing. It was super easy. Lots more winding of the handle but super easy to pull out and use. I will definitely be taking it with me to my upcoming Paper Parties. This card also uses a Your So Lovely, Sale-A-Bration stamp set,  Gorgeous Grunge, and the Chevron background stamp.
This card, I made for my darling daughter. It was inspired by Ilina Crouse. She is an amazing stamper. See her original card HERE. I love the sentiment from the Vivid Vases single stamp. I used my Stampin' Write marker and inked up just the wording. It's a pretty simple and clean looking card, just what I was in the mood for. I hope my Zoë girl likes it!
I made a few of these cards for my boys. It is a 4" X 4" size card. Perfect for my little boys. They will be happy with this small size. I decided to layer the glimmer paper for this one. I love the way the silver glimmer paper makes the red stand out. The pattern paper is from the Fresh Prints Designer Series Paper Pack  (132996) in the Occasions catalog. The stack has so many pretty pages to choose from and so many with the color red. This one here became my instant favorite. I also used it on the card for my hubby. Again, I used the sentiment from the Vivid Vases (133818)  single stamp.

Well, I am off to get our busy day started. We will be having heart shaped waffles just before I run off to work. We have a 2 hour delay due to all of yesterday and this morning's snow. My lucky kiddos have the day off and get to stay home with my hubby. Hope you are enjoying Valentine's Day with your loved ones.

Thanks for stopping by...now go create something!
Shop my online store 24/7


Sunday, September 22, 2013

A Yippee-Skippee Thanks!

If you scroll back you will see what this card looked like for the original design but with some quick changes, I turned it into a Thank You card. Cute right? Not only is it a bright happy card, it's another quick and easy one. We all need a little quick and easy when it comes to cards and this fits the bill. It also comes from the Yippee-Skippee! Stamp set, that we got free at Convention. It's one of Shelli's favorites and she shared it with all of us. I think it may become my favorite sentiment set from this current catalog...there are so many to choose, I may adjust my choice in 2 weeks Ha-ha!
What do you think of this pretty paper? Cute right? It's the Quatrefancy Specialty paper.
Quatrefancy Specialty paper
To get yours, visit my online store 24/7!

Thanks for stopping by...now go create something!

Saturday, September 21, 2013

A Quick and Easy Thanks!

I am spending more time here and there getting some stamping done. I have soooo many thank you cards that I want/need to get out. I have sent thank you emails but still feel a card is in order. I had lots of card kits left over from previous Paper Parties, so I am using these pieces to create Thank you cards. This one is for some of my co-workers. I am a Reading Specialist at an Elementary School. There are six Elementary Schools in my district and each have a Reading Specialist with my same title. Well, they all got together and sent some pampering my way, so I wanted to send some thanks back their way. I love this Awesome Thanks sentiment. It says it all and is what I am feeling. This set comes from the Yippee-Skippee! Stamp set, which all attendees got for free at Convention!


Thanks for stopping by, now go create something!
Shop my online store 24/7

Friday, September 20, 2013

A Special "Big" Thanks!

Sent by Helene Graziano
While home recuperating, I've gotten lots of beautiful cards sent my way, a few hand stamped cards along with adorable store bought cards. They are all so very pretty, but I thought I'd share the hand stamped ones with you today. In addition, so many people have been so kind and thoughtful and have sent my family so many gifts and treats. I haven't had the energy to cook so the kindness of others has really helped us out a lot!!! I am very thankful for all of the specials thoughts, emails, cards, and gifts, help with my kids, help with laundry, and cooking that have helped to lift my spirits and focus on healing.
Sent by Donna Huestedde

Sent by Vanessa Hahn
Yesterday, I noticed this sign on my daughter's door. It was cleaning day and I guess her room wasn't in "cleaning condition." She is such a middle school girl.


 We were well overdue for cleaning. I had cancelled a couple of sessions for our vacation and also for my surgery and my "not getting out of the bed at all time," so we really needed it. I guess she will have to get her own room together. Middle School is keeping her busy. She is even thinking of  (Wait for it...) joining the field hockey team.....Let me explain, my 12 year old knows nothing about hockey, doesn't care for running and LOVES the indoors....Yep, and she is considering Field Hockey. The coach of the team needed one other player and noticed my daughter had her physical signed and in the the nurses office for sports (She, the daughter, had it completed because was thinking of joining the dance troop...) I am excited for her and hope she joins. I think it would be good for her to be a part of a team and I would love to go see her play. Here's to keeping my fingers crossed. She is making her mind up today and if the answer is yes...off to the sports store she and my hubby will go to suit her up. Of course, I will share pics of her first game is she does it. Fingers crossed.

Have a wonderful day!

Thanks for stopping by...now go create something!

Saturday, September 14, 2013

I Am a Cancer Survivor...

For That, I Am Thankful.....(Not My Usual Crafting Post)
Modern Medley Designer Print Paper, Another Thank You Polymer Stamp set 133454
 
Two weeks ago, I underwent surgery to have my left kidney removed. I was diagnosed to have a tumor/mass on it and my doctor wanted to remove it. Before surgery, he told me he believed it to be a benign tumor. That gave me some comfort and it also had a bit of a calming effect on me as I mentally prepared myself for the procedure. I shopped 3 weeks early for my kids school supplies and picked out and lay out their first day clothes. I wanted to make sure I left everything in order...just in case...

As you can tell, everything worked out fine and I am here to tell the tale. My doctor was able to remove my kidney in tact and glued (Yay!!) me back together. I was in the hospital for 4 days recuperating before coming home to recuperate some more. During this time I have become a pro at naps and pill popping. I am hoping to soon stop the latter and get in as many of the former (naps that is) as I can before going back to work.

Yesterday, I went in for my post Op Surgical Follow Up....and this is when I got a real eye opener. My doctor informed me that the tumor in my kidney was indeed cancerous...AND malignant. Stage 1B Papillary Renal Cell Carcinoma. The best news is that the tumor was confined to the kidney...and even more, it was mostly "dead." What? Yeah!!! dead!!! The tumor started to run out of its blood supply so it could not grow anymore... (Did it die from all of my praying and the prayers of my family and friends??? I would like to think so.) When my doctor left the room to get a prescription for me, my husband turned to me and said, "You're a cancer survivor." I was living with cancer and didn't even know it. I am so thankful that it was found and removed and even more....I am thankful that no more treatment is needed. My Cancer story isn't like most that you hear with Chemo, Radiation and such. I didn't have to do any of that. I didn't know I had cancer until I didn't have it anymore. Even without knowing, I am full of all kinds of emotions. I'm speechless, and thankful at the same time as well as scared and relieved at the same time. so....many....emotions! I'm not sure what I should be. It is a scary feeling knowing that cancer was living in me while I stamped in Utah, and sunned in South Carolina. I thank God that I am where I am now, and that everything worked out. I feel both lucky and blessed. I have learned to listen to my body and and am thankful to have found the best doctor. After my appointment, I sat down with my 12 year old daughter and told her about the cancer that lived in my body. After a few moments, she smiled, looked at me and said the exact same statement her father said 2 hours prior, "I guess that means you are a Cancer Survivor!" She is more like her father every day and sooo mature!!!
Envelope using the Envelope Punch Board 133774
I made this Thank You card and envelope for my co-workers.  They sent me an awesome gift for my recovery. Being off my feet, meals happen to be our greatest challenge and their gift made meal time a lot easier for us so this card is my thank you to them. It's been weeks since I've stamped anything and having this be the first thing I've stamped is a good feeling. I stamped this card and crawled back into bed. It was exhausting...funny I know, but true! I think I slept a good 2 hours after making this card and envelope. After writing this, I realize I need to add another card to my growing list. A card for the wonderful medical staff that took care of me for four days on the 9th floor at the Hospital of the University of Pennsylvania. The are the BEST at what they do...Amazing!!! I am proud to accept and acknowledge that I am indeed a Cancer Survivor!

Thanks for stopping by...

Thursday, August 22, 2013

A Quick and Easy Thinking of You Card


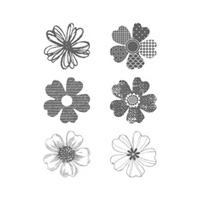
Thinking of You is a sentiment that I seem to need most often in a card. This card is from Barb's Paper Party earlier this month. These flowers are from the Flower Shop stamp set and were so much fun to stamp and punch out. There are six different flower patterns to choose from in this set and they are each equally cute! Although settling on just three flowers was hard, the punching proved to be the most challenging part as you have to line up the flower just right with the Pansy punch it without cutting off part of the leaves. It was easier for me than for the it was for Barb and her guests but they all got the hang of it and were very pleased with their cards. This card is very vibrant and colorful!

Flower Shop
Flower Shop stamp set of 6


If you like this stamp set, you can save money by purchasing the Flower Shop bundle which includes the Pansy punch. You get both the stamp set and the punch for 15% off their price if bought separately.

Card Recipe:
Stamp sets:  Flower Shop  and Four You
Card stock: Calypso Coral, Very Vanilla, and Epic Day This and That Designer Series Paper
Ink: Calypso Coral, Gumball Green, and Pool Party

Thanks for stopping by.... shop my online store 24/7

Maureen


Wednesday, August 21, 2013

Really Good Greetings...A Super Cute Card!

Today's card is super cute! I cased it from my second level upline, Gail. You can see hers HERE. This was one of the cards guests made at my August Paper Parties. The ladies thought this was a funky, grungy kind of a card. It's easy to make and fun too! I stamped the blotches using the Grunge stamp set onto the Daffodil Delight patterned paper. I LOVE the effect it made. Cute right? It is super easy to recreate! I am really starting to like the Gorgeous Grunge stamp set. It is super cool! We got this stamp set at Convention. So glad, because to look at it in the catalog, I probably would not have chosen it...but there are lots of possibilities with this one. You can definitely expect to see more from me using this stamp set.

Card Recipe:
Stamp sets: Mosaic Madness, Gorgeous Grunge, and Really Good Greetings
Ink: Daffodil Delight, Strawberry Slush, and Island Indigo
Card stock: Daffodil Delight, Island Indigo, Whisper White, and Quatrefancy Specialty Designer Series paper
Accessories: White Baker's Twine

The family and I are in Myrtle Beach, SC, having a blast. I'm hoping to make some MDS pages tonight...so check back to see those.


Thanks for stopping by....shop my online store 24/7

Tuesday, August 6, 2013

Got Hostesses?


Four You stamp set


So you've heard of the slogan,  "Got Milk?" well I thought I'd change it up a bit and start a new conversation..."Got Hostesses?" I know that is the big question these days, well there are many perks to being a hostess... 
  • You'll enjoy some quality girl-time
  • You'll create projects that are playful and useful (look at today's card!)
  • You'll get FREE stuff that's beyond awesome
  • What's better than free?
This is one of the cards that I will demonstrate and guests will create at this month's Paper Parties. It uses the Four You stamp set along with the Beautifully Baroque Dry Embossing folder, the super cute Tea Lace Paper Doilies, and the Blossom Punch. Although there is very little stamping on this card I do believe it makes a statement just the same.

Tips and Tricks: Distressing your paper adds texture to your focal point. On this card, I distressed the Blossom punch after layering three of them, slightly off setting each of them as I added a new one. You can distress to the point of really loosening the fibers to create the look of material.

Thanks for stopping by...now go stamp something!!!

Shop my online store 24/7

Maureen

Sunday, June 30, 2013

June Paper Pumpkin by Stampin' Up!

More and more of my customers are signing up for their monthly treat! Stampin' UP!'s aper Pumpkin. This video is a great way to learn how to put the contents of the kit together. It's also the perfect way to see first hand, the Paper Pumpkin experience. You'll see just how easy it is to enjoy a creativity escape each month. Go HERE to sign up for your very own.

Thanks for stopping by.

Wednesday, June 19, 2013

Kids Card Class

Kids of all ages just love to stamp. During the school year there are many events to raise money. During one of the events my school (where I teach) had a Silent Auction. One of the items in the Auction was a stamp class for a child and four friends. My good friend, Sam, and I offered this item. We each designed two cards. Here is one of the ones that I designed. The kids were in grades K, 1, and 5 which presents many challenges. We kept the cards quick, easy and appealing. For this card I used the By the Tide stamp set. I ran each of the cards through the Big Shot in the Perfect Polka Dots dry embossing folder. The card base is Old Olive. The Whisper White card stock is layered on Tangerine Tango. For a bit of pizazz I add some dazzling diamonds because most little girls love glitter! I can't remember where the Thanks so much sentiment comes from. Leave me a comment if you know. I took it out of the appropriate set and I don't know where to put it back. Oooops!

Thanks for stopping by...now go create something!

Tuesday, June 18, 2013

Thank you to the Teacher

Have you ever needed a card quickly and in a hurry? Well, how about 11 of them? Well that is just what happened to me when I realized the end of the school year creeping up on me and I didn't have any thank you cards on hand. I decided to let MDS do the trick. I found this layout/design through the MDS program and decided it would fit my needs. I changed some of the background colors, made additional color changes. I printed the top layer out 11 times. I cut it at 4"  X  5-1/4" and then layered it onto a grey card stock card base. I also added some pretty rhinestones and voila, I had 11 cards ready to go. It was quicker than stamping! Could NEVER replace stamping but is a very good option to have. I was really impressed with my MDS cards.

Like what I did? Get your free MDS 30 day trial HERE.

Thanks for stopping by...now go stamp something!

Sunday, June 16, 2013

Ode to Henry - Masking and Sponging

This is another card I made using the masking and sponging technique that I came across on Heather North's blog. She has some really cute cards on her blog. Check her out!

For this card I decided to use the retired Henry Says stamp set. I am so sad that this stamp set didn't make it into the new catalog. I decided to use it anyway. I used Black Stazon ink to stamp Henry over the background sponging. For the sponging, I used Primrose Petals, River Rock (Yeah, sadly that's retired now too!) and Raspberry Ripple. This was a very easy and fun card to make. I layered the Whisper White on Crumb Cake card stock. Don't forget to check out Heather's blog.

Thanks for stopping by...now go create something!

Tuesday, May 21, 2013

Awesome Layer Effect!


This was a fun card to make. This was a technique I saw on a fellow stamper's youtube video and I thought I just had to try it. I am so very glad that I gave it a go! To make this card I cut out a rectangle, 3-3/4" X 5" from white copier paper.  I created a frame with my rectangle by tearing out the inside, thereby creating a smaller rectangle inside of the larger rectangle. I then used 2-way glue around the edges of the inner rectangle. I sat my rectangle aside to let it dry. When 2-way glue is left on a surface to dry, it becomes an adhesive equal to that of a post it. Once I had my "post it" rectangular frame, I centered it on a 4" X 5-1/4" piece of whisper white card stock. I used my sponge daubers and my River Rock, Old Olive, and Baja Blue Classic ink and applied ink in the center of my frame. I inked the center with the River Rock, then inked the top with Old Olive and the bottom with Baja Blue. I gently pulled off my frame revealing a lovely tri-colored, misshaped rectangle. This became my background on the card as well as a frame. It created the appearance of an additional layer.  I made this card for my son's friend's birthday. This card uses the retired Extreme Skateboarder. I can't seem to let go of this stamp. It was and still is my favorite stamp set for creating a card for a boy's birthday.


Here is another card using the same very fun technique.  I think I actually made this one first. I found this technique to be a lot of un and easy too! Recently, I tried it with some of my other favorite colors.

Thanks for stopping by, now go spark some creativity!

Friday, May 17, 2013

It's In The Mail! - Stampin' Up!'s My Paper Pumpkin

I got an email the other day letting me know that  my monthly Paper Pumpkin kit from Stampin' Up! is on its' way! Haven't ordered yours yet? What are you waiting for? It comes to your door each month (a fully decked-out creativity carriage). It will help you to escape your life with some paper fun. It's like your own little "Paper Party," in a box!
It comes in a sweet box, but you'll really love what you find on the inside:
All the stamps, ink, paper, and accessories to create pinable projects. Create stuff like cards, journals, décor, and more!
Paper Pumpkin by Stampin' Up! is a new monthly kit program that anyone can enjoy! Click HERE to JOIN NOW and get your own Paper Pumpkin. You'll be so happy you did!


Monday, April 15, 2013

A Baltimore Regionals Share

I thought I'd share a bit more from my Baltimore Regionals day. One of the highlights is that Shelli Gardner, the CoFounder and CEO of Stampin' Up! was in attendance. I have been to several Regionals on the east coast and this was the first time she was able to attend. It was so great to see her. She really does add another level of excitement to an event.

Do you see the super cute little notebook in the picture above? It was a Regional gift from my second level upline, Gail Murray. She also gave us some yummy treats and water. She always takes good care of us. I am so lucky to have two wonderful uplines. Gail and my first level upline, Jacki, who wasn't able to. Hopefully we will all be together for convention.

 Here is one of our Make n' Takes. This card was fun to make. I never made one like this before but really LOVE how it turned out. That Stampin' Up! creative team really knows their stuff!

 I found this little notebook cover to be uh-dor-uh-ble! We scored the gray background paper at 1/2" each way then added the whisper white layer which we stamped using the Clockworks stamp set. We adhered both layers to a little white notepad. Super cute, right? I love this one.

 This was our last make n' take. There was a tag box that went along with this, but I chose not to make it because I didn't want it to get squished. I did however make the flower portion of the box. It was too cute to pass up on. The cards I made were created to go in the box that I didn't make (smile). These cards were also made with the Clockworks stamp set (wood 127290  or clear 127292)). I am liking this stamp set more and more. You can get yours by visiting my online store.

Well, thanks for stopping by, now go create something!